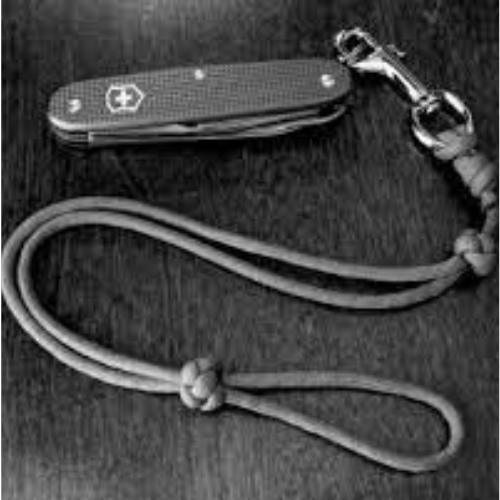
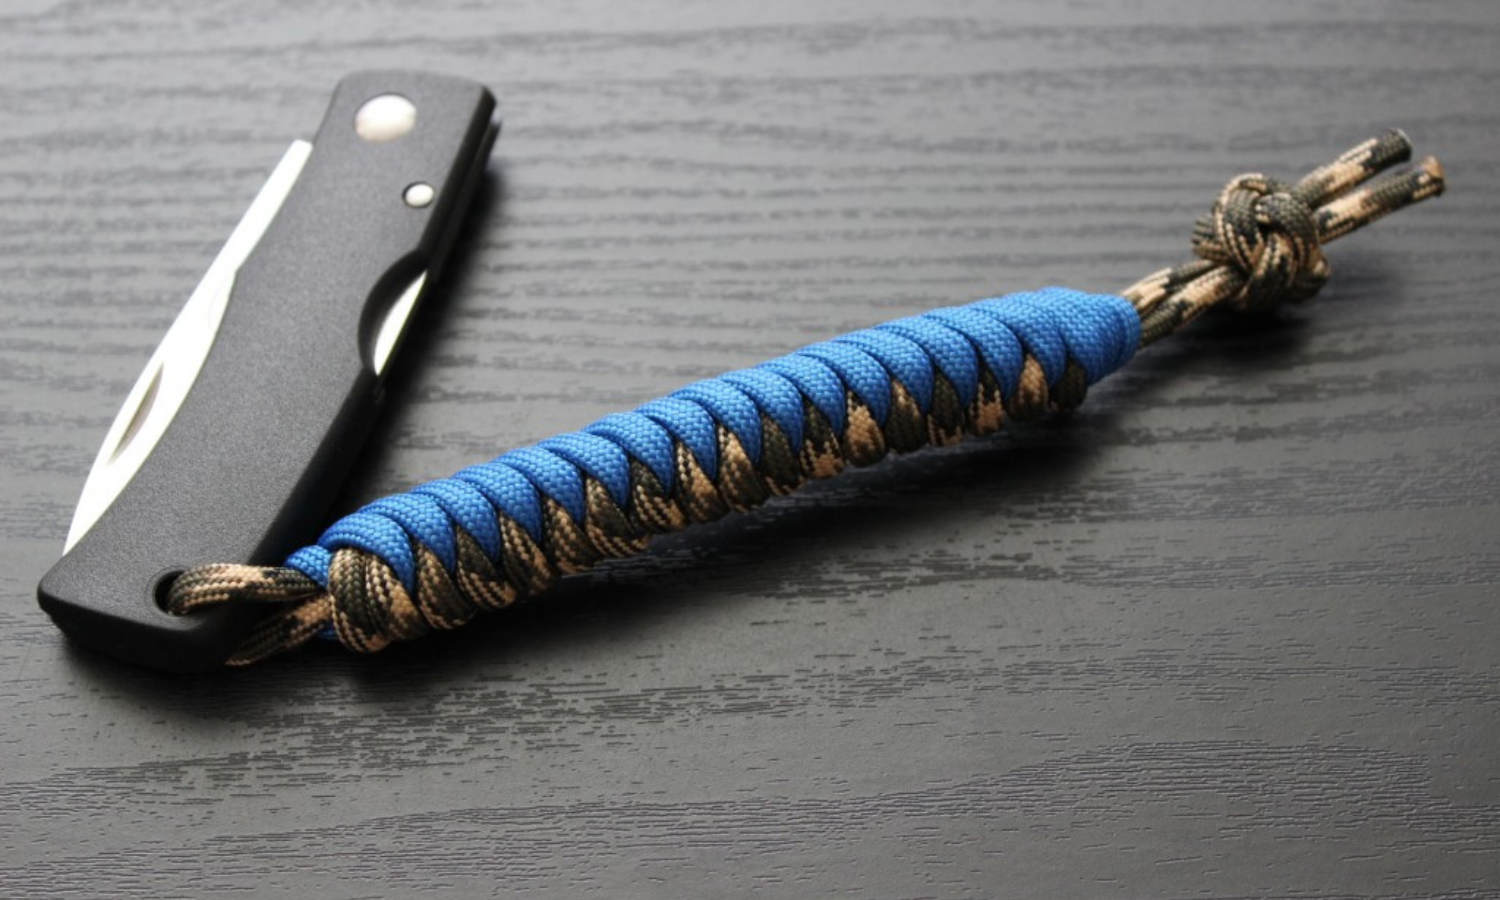
A paracord lanyard is a handy addition for everyone who owns a knife since it provides a safe and convenient method to carry and access the blade. These lanyards are constructed from high-strength paracord, making them excellent for outdoor activities such as camping, trekking, and hunting. This article will discuss the advantages of utilizing a paracord lanyard for your knife and offer detailed instructions on how to create one.
Part 1: Setting Up The Paracord
Gather your materials
To create a paracord lanyard, you will need at least 6–13 feet of paracord 550, a metal carabiner clip, snap hook, or metal key ring, a ruler or tape measure, a twist tie (or anything that allows you to quickly designate the center of the rope), scissors, and a lighter.
The proportions of the paracord can vary based on the desired length of the lanyard. For every foot of paracord used, approximately one inch of braiding knots will result.
If you solely use cobra stitching to create a lanyard, you may only need 6–8 feet of paracord. To build a king cobra stitched lanyard, you may need around 13 feet.
For instance, eight feet of paracord will result in around eight inches of braided knots for your lanyard.

Mark the center of your paracord
Fold your 6-to-13-foot-long paracord in half. Mark the center by tying a twist knot or rubber band around the paracord at the top of the fold.
You may use whatever sort of marker you choose; just make sure it stays in place while you tie the knot and can be readily removed afterward.
Tie a lanyard knot
If you are doing this knot for the first time, it may be helpful to picture how the cords interweave to tie the knot on a piece of paper. Make two holes in the center of the paper, 4 inches apart and vertically stacked on top of one another. Thread the paracord’s loose ends through the paper’s perforations, with the looped end of the lead on the left side of the paper and the loose ends on the right. Drag the cables through the paper until there is no visible loop on the left side and the “loop” is flush with the paper. You will need a two-inch loop after tying the knot, so pulling the cords flush against the paper will help you achieve this. Place the paper on the table flat.
- Take the paracord passing through the paper’s bottom hole and form a loop close to the hole.
- Next, insert the paracord traveling through the upper hole beneath the loop of the lower paracord. Let the lead pass through the center of the loop. For instance, the top leadership should resemble a “pupil” passing through an “eyeball” (the loop). Place the top cord underneath the tail cord of the lower loop.
- Thread the tag end of the top paracord through the right side of the “eyeball,” beneath the “pupil,” and back up through the left side of the “eyeball.” Pull both tails of the cords gently to slightly tighten the knot. You should have an intricate and reflective knot design.
- Bring the tag end of the paracord coming from the bottom of the knot around to “trace” the right side of the knot, past the top hole where the other cord is entering, and beneath all of the higher cords, until it emerges through the “eyeball” center. The same method will be used for the second tag end of the paracord.
- Pull the top paracord tail around to “trace” the left side of the knot, past the hole from where the other cord is emerging, below all the lower cords, and up through the “eyeball” center of the knot.
- Pull off the sheet of paper, and grasp the looped lead that was on the opposite side. Pull and tug gradually on both tag ends of the paracords while retaining the looped lead. Ensure that the looped side of the lanyard knot has a loop of approximately two inches.
- The designated center of the paracord should be centered within this two-inch loop.
Make a simple overhand knot
If the lanyard knot seems too complicated and intricate, you can make a simple overhand knot. From the looped portion of the paracord, pinch down the paracord about 2 inches from the top of the loop. Twist the loop over the tag ends to make another larger hoop, and pull the center of the looped paracord through the middle of the larger hoop.
Part 2: Braiding The Paracord
Connect the paracord to the carabiner
Through the loop of the carabiner clip, the snap hook hole, or the metal key ring, thread the two free ends of the paracord. [8] Pull the ends through the loop until the knot is approximately 5 inches from the clip’s base.
- If the hole in the snap hook is rather large, you can wrap the ends of the cord around again to fill up more of the area.
Cobra stitch the paracord
The two cords that will be knotted to make the cobra stitch are the paracord’s terminal segments. You will be tying knots onto the two center cords that extend 5 inches down from the carabiner’s base. Fold the paracord in your left hand to the right, over and over the two middle cords. Then, slip the right-hand paracord over the end of the left-hand paracord, under the two center cords, and up through the loop formed by the left-hand paracord. Then, tighten the loose ends.
- For the subsequent knot, follow the same steps, but with the other side facing up. Fold the paracord in your right hand to the left across the two middle cords. Then, slip the left-hand paracord over the end of the right-hand paracord, under the two center cords, and up through the loop formed by the right-hand paracord. Then, tighten the loose ends.
- Alternate which side of the paracord is crossed over the two middle cords to create the initial loop as you continue to tie the knot. For instance, during the first knot, the loop was created with the left-hand paracord. For the next knot, begin the loop with the paracord in your right hand. For the subsequent knot, begin the loop with the left hand paracord, and so on.
- Continue cobra stitching over the two central strands until each side of the lanyard has 11-knot bumps. If this lanyard meets your needs, you may trim the surplus cord and melt the ends into the remaining paracord. If you choose to utilize the remaining paracord, you may perform a king cobra stitch.
King cobra stitch the paracord
A King cobra stitch employs the same method as a cobra stitch; however, it is performed on top of an existing cobra stitch and makes the lanyard thicker. Continue cobra-stitching the paracords back toward the carabiner end using the same approach of alternating sides employed previously. Begin by forming the initial loop with the paracord that has just been passed through a loop.
- You can determine which type of paracord this is by examining the sides and seeing which type of paracord emerges from behind the bump loop on the lanyard.
- In order to create even king cobra stitches, you may need to use your fingers to press the knots toward the top. However, the sides of the king cobra stitch will naturally align with the gaps between the original cobra threads.
Cut and melt the loose ends
When you have completed king cobra stitching all the way down to the end of the carabiner, trim the paracord ends. Allow roughly a quarter-inch of space on the cut ends. Using the lower, darker portion of a brighter flame, melt each cut end of the paracord rather of burning it. After approximately 5 to 10 seconds of melting the end of the paracord, press the melted end against the remainder of the lanyard using the metal portion of your lighter. This will assist in cooling the melted paracord and connecting it to the remainder of the lanyard.
- Repeat this melting process for the other cut end of the paracord. When both loose ends of the paracord have been melted and secured, the paracord lanyard is ready for use.
Bottom Line
A paracord lanyard is a simple and useful addition for everyone who owns a knife. By connecting one to your knife, you can ensure that the blade is always immediately available and within reach. Using the detailed techniques offered in this blog article, it is simple to build a paracord lanyard that complements your knife and personal style. Why not add a paracord lanyard to your knife and take advantage of its ease and functionality?
